Creating a New Programming Language That Will Allow Anyone to Make Software
I’ve spent the last 7 months working on a new programming language called MSON. Here is a nerdy post about why I did it, how it works and where I want to take it.
There are already a bazillion programming languages, why do we need another?
Software continues to eat the world and software development tools are evolving at lightning speeds, but it stills takes an in-depth knowledge of a programming language to develop software. Sure, there are millions of open-source projects that can be mashed together and robust cloud platforms that make the process easier, but it takes considerable skill to get all of these technologies working together. When I envision the future, I imagine the average person being able to make software, just like how the average person can create a spreadsheet today.
Creating a spreadsheet has become commonplace and this is largely a result of the intuitive user interface (UI) in MS Excel. Developing software; however, still remains something that is only done by a relative few and using complex programming languages. One could argue that it is somewhat trivial to create a UI that generates code, but it is almost infeasible to reverse the process and digest coded logic, as most programming languages have an almost infinite number of ways of representing logic. In other words, we don’t usually know how a piece of software will execute until we actually execute it. Creating a truly intuitive way of developing software requires a new paradigm, a new language that is easily read, modified and written by a UI.
It was back in 2003, when PHP was the hotness, that I started constructing a framework called FORMfields. At the time, FORMfields was pretty cool as you could create forms with PHP objects and then FORMfields would automatically generate the corresponding HTML, CSS and JS. Soon after creating FORMfields, I co-founded a company called GoExpo that produces event management software that is powered by FORMfields. GoExpo grew to process millions of dollars in booth sales annually for some of the largest trade shows in the world and this was a testament to the effectiveness of FORMfields.
Over the years, FORMfields continued to be essential in allowing our team to create a consistent UI that could be modified quickly (remember, these were the days before Twitter Bootstrap and more modern UI frameworks). However, as browsers were becoming more capable, more logic was moving into the front end; and FORMfields, which is written in PHP, only runs in the back end.
Fast forward to 2018, where JavaScript is the workhorse of the web and the difference between the front end and back end can feel like night and day. GoExpo has been acquired and I now have time to revisit the notion of FORMfields with a more modern stack. I want the next generation of FORMfields to run in both the browser and the back end, be open source and become the foundation of something that can be used by the masses.
This line of thinking has given birth to MSON, an extensible declarative language that can be easily manipulated by a UI. MSON is comprised of just a few building blocks, yet it is as powerful as its non-declarative counterparts.
The purpose of this initial post is to introduce the core principles of the MSON programming language and elaborate on its unique design. I plan on writing a follow-up post later that will explain MSON from a layman’s perspective. This post; however, is rather technical as it is about the developer-layer stuff in MSON and not about the designed-for-all UI layer I’ll be writing on top. I will be elaborating on the following topics:
- Declarative Syntax
- Components, Validators, Events & Listeners
- Access Control
- Inheritance, Template Parameters & Composition
- Aggregate Components
- Schemas and Self Documentation
- User-Defined JavaScript Components
- Using MSON in Any JavaScript Code
- Reusing MSON Code Throughout the Full Stack
- In/Out Properties
I will then finish with a statement about how I plan to monetize MSON and make it a self-sustaining project. I’d love to hear what you think.
Language Principles
Declarative Syntax
MSON is short for Model Script Object Notation, which is intentionally similar to JSON (JavaScript Object Notation). In fact, MSON is a subset of JSON, so if you know JSON then you know the syntax of MSON!
Declarative languages are much easier for software to read and write as they define what the software must do without stating exactly how to do it. And JSON is a great foundation on which to build. It contains just a few main constructs, is ubiquitous and supported by a vast ecosystem.
Components
The smallest building block in MSON is called a component. Components maintain state and can also control presentation and are very similar to the components now commonplace in most web frameworks. Components can inherit, contain or wrap other components. The rendering layer supports plugins for different environments and the default plugin supports React and Material-UI. Use of the rendering layer is optional, so components can be used on both the front end and back end.
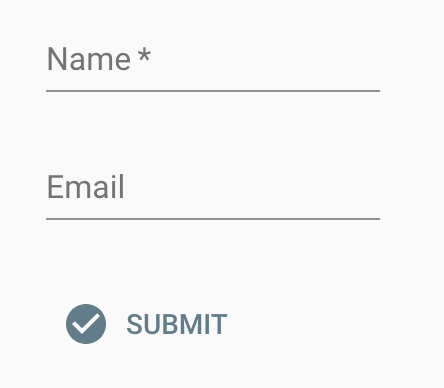
A simple form component used to collect a name and email address could look like:
{
  name: 'MyForm',
  component: 'Form',
  fields: [
    {
      name: 'name',
      component: 'TextField',
      label: 'Name',
      required: true
    },
    {
      name: 'email',
      component: 'EmailField',
      label: 'Email'
    },
    {
      name: 'submit',
      component: 'ButtonField',
      label: 'Submit',
      icon: 'CheckCircle'
    }
  ]
}
And when it renders it looks like:
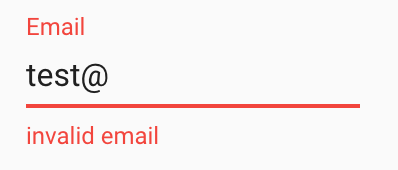
And, real-time validation is automatically baked in:
The majority of the remaining examples in this post will focus on form components, as they are simple to visualize, but MSON can support any type of component, e.g. menus, snackbars, redirects, etc… In addition, you can use JavaScript to create user-defined components that can pretty much do anything else you can imagine.
Validators
Each field has a default set of validators, e.g. the EmailField ensures that email addresses are in a valid format. You can also extend these validators for a particular field or even for an entire form.
For example, you can prevent the user from entering nope@example.com:
{
  name: 'MyForm',
  component: 'Form',
  fields: ...,
  validators: [
    {
      where: {
        'fields.email.value': 'nope@example.com'
      },
      error: {
        field: 'email',
        error: 'must not be {{fields.email.value}}'
      }
    }
  ]
}
Template parameters like {{fields.email.value}} can be used to inject the values of fields. And, you can use any MongoDB-style query in the where. For example, if you had password and retypePassword fields, you could ensure that they are equivalent with:
where: {
  'retypePassword.fields.value': {
    $ne: '{{fields.password.value}}'
  },
  error: ...
}
Events & Listeners
Changes to properties in a component generate events and you can create listeners that respond to these events with actions. There are basic actions that set, emit, email, contact APIs, etc… and custom actions can also be built using JavaScript.
The following example sets the value of the email field based on the value supplied in the name field when the user clicks the submit button:
{
  name: 'MyForm',
  component: 'Form',
  fields: ...,
  validators: ...,
  listeners: [
    {
      event: 'submit',
      actions: [
        {
          component: 'Set',
          name: 'fields.email.value',
          value: '{{fields.name.value}}@example.com'
        }
      ]
    }
  ]
}
We can also make this action conditional, e.g. only set the email if it is blank:
listeners: [
  {
    event: 'submit',
    actions: [
      {
        component: 'Set',
        if: {
          'fields.email': {
            $or: [
              {
                value: null
              },
              {
                value: ''
              }
            ]
          }
        },
        name: 'fields.email.value',
        value: '{{fields.name.value}}@example.com'
      }
    ]
  }
]
And sometimes we want to nest actions so that a condition is met before all actions are executed:
listeners: [
  {
    event: 'submit',
    actions: [
      {
        component: 'Action',
        if: {
          'fields.email': {
            $or: [
              {
                value: null
              },
              {
                value: ''
              }
            ]
          }
        },
        actions: [
          {
            component: 'Set',
            name: 'fields.email.value',
            value: '{{fields.name.value}}@example.com'
          },
          {
            component: 'Set',
            name: 'fields.name.value',
            value: '{{fields.name.value}} Builder'
          }
        ]
      }
    ]
  }
]
Access Control
Unlike most programming languages, access control is a first-class citizen in MSON, so its easy to use without a lot of work. Access can be restricted at the form or field layers for the create, read, update and archive operations. (MSON is designed to encourage data archiving instead of deletion so that data can be restored when it is accidentally archived. You can, of course, permanently delete data when needed).
Each user can have any number of user-defined roles and access is then limited to users with specified roles. There is also a system role of owner that is defined for the owner of the data. Field-layer access is checked first and if it is missing it will cascade to checking the form-layer access. When the access is undefined at the form layer (and not defined at the field-layer), all users have access.
Here is an example configuration:
{
  name: 'MyForm',
  component: 'Form',
  fields: ...,
  validators: ...,
  listeners: ...,
  access: {
    form: {
      create: ['admin', 'manager'],
      read: ['admin', 'employee'],
      update: ['admin', 'owner', 'manager'],
      archive: ['admin']
    },
    fields: {
      name: {
        create: ['admin'],
        update: ['owner']
      }
    }
  }
}
Among other things, only users with the admin or manager roles can create records. In addition, only owners of a record can modify the name.
Inheritance
Inheritance is used to add additional functionality to a component. For example, we can extend MyForm and add a phone number:
{
  name: 'MyFormExtended',
  component: 'MyForm',
  fields: [
    {
      name: 'phone',
      component: 'PhoneField',
      label: 'Phone Number',
      before: 'submit'
    }
  ]
}
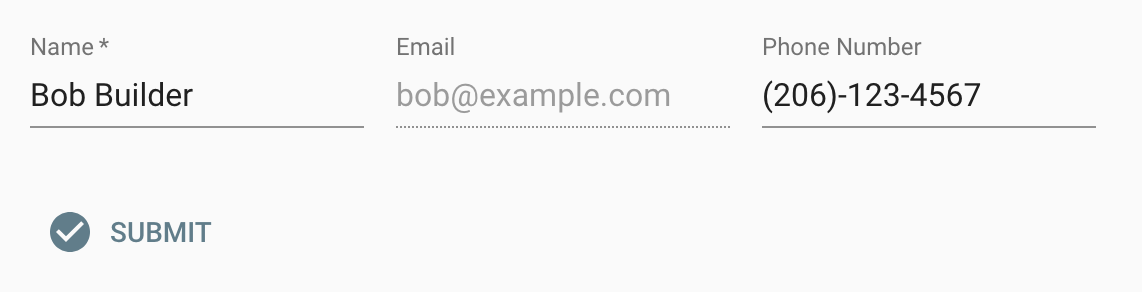
We can define new validators, listeners, access, etc… at this new layer. For example, we can pre-populate some data, lay out all fields on the same line and disable the email field by creating a listener for the create event:
{
  name: 'MyFormExtended',
  component: 'MyForm',
  fields: ...,
  listeners: [
    {
      event: 'create',
      actions: [
        {
          component: 'Set',
          name: 'value',
          value: {
            name: 'Bob Builder',
            email: 'bob@example.com',
            phone: '(206)-123-4567'
          }
        },
        {
          component: 'Set',
          name: 'fields.name.block',
          value: false
        },
        {
          component: 'Set',
          name: 'fields.email.block',
          value: false
        },
        {
          component: 'Set',
          name: 'fields.email.disabled',
          value: true
        }
      ]
    }
  ]
}
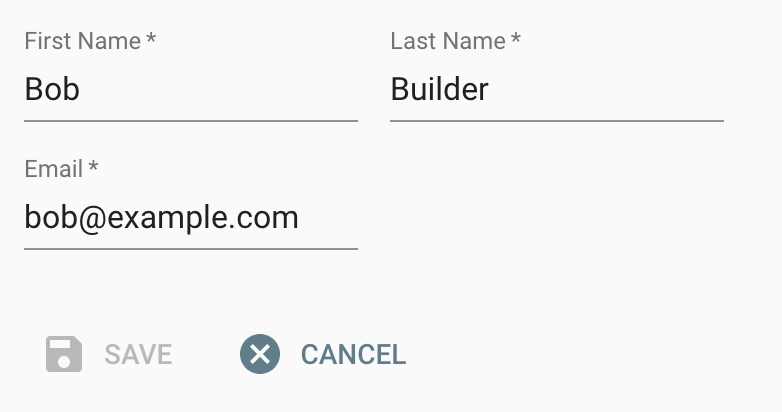
which would render as:
Template Parameters
Template parameters are helpful when creating reusable components as they allow you to make pieces of your component dynamic. For example, let’s say that we want our first field and the label of our second field to be dynamic:
{
  name: 'MyTemplatedForm',
  component: 'Form',
  fields: [
    '{{firstField}}',
    {
      name: 'secondField',
      label: '{{secondFieldLabel}}',
      component: 'EmailField'
    }
  ]
}
we can then extend MyTemplatedForm and fill in the pieces:
{
  name: 'MyFilledTemplatedForm',
  component: 'MyTemplatedForm',
  firstField: {
    name: 'firstName',
    component: 'TextField',
    label: 'First Name'
  },
  secondFieldLabel: 'Email Address'
}
Composition
The componentToWrap property allows you to wrap components, enabling your reusable components to transform any component. For example, we can use composition to create a reusable component that adds a phone number:
{
  name: 'AddPhone',
  component: 'Form',
  componentToWrap: '{{baseForm}}',
  fields: [
    {
      name: 'phone',
      component: 'PhoneField',
      label: 'Phone Number',
      before: 'submit'
    }
  ]
}
and then pass in a component to be wrapped:
{
  name: 'MyFormWithPhone',
  component: 'AddPhone',
  baseForm: {
    component: 'MyForm'
  }
}
You can even extend wrapped components, paving the way for a rich ecosystem of aggregate components comprised of other components.
Aggregate Components
MSON ships with a number of aggregate components such as the RecordEditor and RecordList, which make it easy to turn your form components into editable UIs with just a few lines of code.
Let’s define a user component:
{
  name: 'MyAccount',
  component: 'Form',
  fields: [
    {
      name: 'firstName',
      component: 'TextField',
      label: 'First Name'
    },
    {
      name: 'lastName',
      component: 'TextField',
      label: 'Last Name'
    },
    {
      name: 'email',
      component: 'EmailField',
      label: 'Email'
    }
  ]
}
we can then use a RecordEditor to allow the user to edit her/his account:
{
  name: 'MyAccountEditor',
  component: 'RecordEditor',
  baseForm: {
    component: 'MyAccount'
  },
  label: 'Account'
}
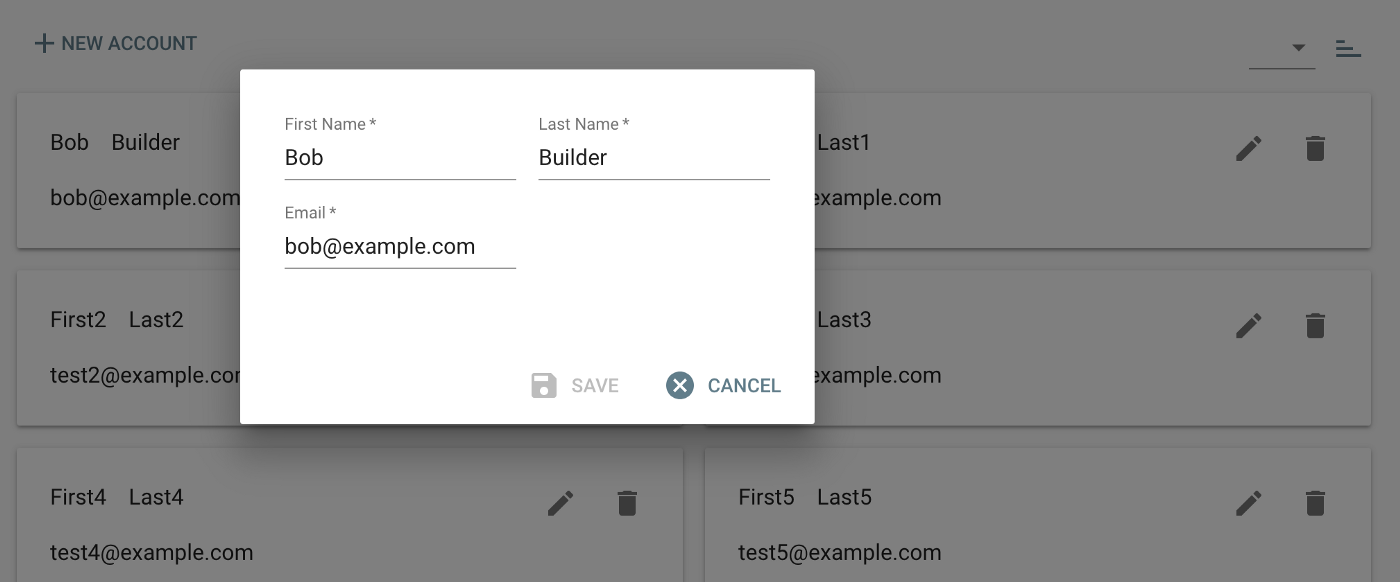
rendering as:
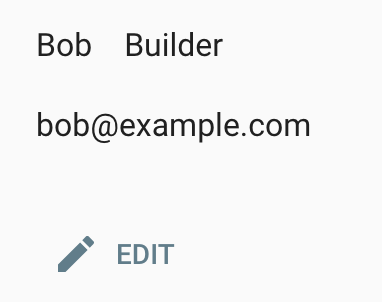
and if you were to click the Edit button you’d see:
You can also use the RecordList to display an editable list of these accounts:
{
  name: 'MyAccountsList',
  component: 'RecordList',
  label: 'Accounts',
  baseFormFactory: {
    component: 'Factory',
    product: {
      component: 'MyAccount'
    }
  }
}
rendering as:
Schemas and Self Documentation
Schemas must be defined for all components, which means that MSON is strongly typed. For example, a schema that defines boolean and date properties may look like:
{
  name: 'MyComponent',
  component: 'Component',
  schema: {
    component: 'Form',
    fields: [
      {
        name: 'hidden',
        component: 'BooleanField',
        help: 'Whether or not the component is hidden'
      },
      {
        name: 'updatedAt',
        component: 'DateTimeField',
        required: true,
        help: 'When the component was updated'
      }
    ]
  }
}
Schemas can also contain documentation via help properties, which means that components are self-documenting! In addition, schemas are inherited and can be overwritten to allow for more or even less constraints.
User-Defined JavaScript Components
The MSON compiler is written in JavaScript and can run in both the browser and in Node.js. As such, you can use any custom JS, including external JS libraries, to create your own components.
For example, here is a component that uses Moment.js to set a currentDay property to the current day:
import compiler from 'mson/lib/compiler';
import Component from 'mson/lib/component';
import Form from 'mson/lib/form';
import { TextField } from 'mson/lib/fields';
import moment from 'moment';
class MyComponent extends Component {
  // className is needed as JS minification strips the constructor name
  className = 'MyComponent';

  create(props) {
    super.create(props);
    this.set({
      // Define a currentDay property
      schema: new Form(
        fields: [
          new TextField({
            name: 'currentDay'
          })
        ]
      ),
      // Default currentDay
      currentDay: moment().format('dddd')
    });
  }
}
compiler.registerComponent('MyComponent', MyComponent);
And then MyComponent can be used in any MSON code.
You can also do things like define custom asynchronous actions, e.g. one that POSTs form data:
import compiler from 'mson/lib/compiler';
import Action from 'mson/lib/actions/action';
import Form from 'mson/lib/form';
import { TextField } from 'mson/lib/fields';

class MyAction extends Action {
  className = 'MyAction';

  create(props) {
    super.create(props);
    this.set({
      schema: new Form(
        fields: [
          new TextField({
            name: 'foo'
          })
        ]
      )
    });
  }

  async act(props) {
    const form = new FormData();
    form.append('foo', this.get('foo'));
    const account = props.component;
    form.append('firstName', account.get('firstName');
    form.append('lastName', account.get('lastName');
    form.append('email', account.get('email');
    return fetch({
      'https://api.example.com',
      {
        method: 'POST',
        body: form
      }
    })
  }
}

compiler.registerComponent('MyAction', MyAction);
And then you can use this in your MSON code:
{
  name: 'MyAccountExtended',
  component: 'MyAccount',
  listeners: [
    {
      event: 'submit',
      actions: [
        {
          component: 'MyAction',
          foo: 'bar'
        }
      ]
    }
  ]
}
Using MSON in Any JavaScript Code
There is always parity between compiled and uncompiled components so that the same feature set is supported by both compiled and uncompiled code. For example, our same MyAccount component can also be defined as:
import Form from 'mson/lib/form';
import { TextField, Email } from 'mson/lib/fields';

class MyAccount extends Form {
  className = 'MyAccount';

  create(props) {
    super.create(props);
    this.set({
      fields: [
        new TextField({
          name: 'firstName',
          label: 'First Name'
        }),
        new TextField({
          name: 'lastName',
          label: 'Last Name'
        }),
        new EmailField({
          name: 'email',
          label: 'Email'
        })
      ]
    })
  }
}
In fact, converting MSON code to this type of code is basically what the compiler does. Although, the compiler doesn’t actually transpile MSON to JS, it merely instantiates JS code based on the MSON definitions.
Since all MSON code can be compiled to JS code, you can use MSON components in any JS code. For example, you can set some fields and validate the data:
import compiler from 'mson/lib/compiler';
// Compile the MyAccount component
const MyAccount = compiler.compile({
  component: 'MyAccount'
});
// Instantiate the JS class with a default value
const myAccount = new MyAccount({
  // Default values
  value: {
    firstName: 'Bob'
  }
});
// Set the remaining data
myAccount.set({
  lastName: 'Builder',
  email: 'invalid-email@'
});
// Make sure the values are valid
myAccount.validate();
if (myAccount.hasErr()) {
  console.log(myAccount.getErrs());
}
In other words, you can use MSON in your existing JS code to save time writing complex code. By declaring components in MSON, you’ll remove a lot of boilerplate code and reduce the possibility of bugs. You’ll also have code that has a standard structure and is framework agnostic. And this code doesn’t add any unneeded frameworks or back-end dependencies to your codebase.
Reusing MSON Code Throughout the Full Stack
MSON components can be shared by both the front end and back end, allowing for key logic to be written once and then reused. For example, the same form validation rules can be enforced in the browser and by your back-end API.
Moreover, actions can be limited to the backEnd or frontEnd, so that the same component can adjust according to the host environment. For example, you may want a contact form to send an email to the user when it is used on the back end, but only display a snackbar on the front end:
{
  component: 'Form',
  fields: [
    {
      name: 'email',
      component: 'EmailField',
      label: 'Email'
    },
    {
      name: 'message',
      component: 'TextField',
      label: 'Message'
    },
    {
      name: 'Submit',
      component: 'ButtonField',
      label: 'Submit'
    }
  ],
  listeners: [
    {
      event: 'submit',
      actions: [
        {
          // Send an email on the back end
          component: 'Email',
          layer: 'backEnd',
          from: '{{fields.email.value}}',
          to: 'noreply@example.com',
          subject: 'My message',
          body: '{{fields.message.value}}',
          // Detach so that user doesn't have to wait for email
          // to send
          detach: true
        },
        {
          // Display a message to the user on the front end
          component: 'Snackbar',
          layer: 'frontEnd',
          message: 'Thanks for the message'
        }
      ]
    }
  ]
}
In/Out Properties
Sometimes you want the presence of data, but don’t want it to be written or read from the back end. For example, your default user component may not allow for the password to be read or edited:
{
  name: 'MyUser',
  component: 'Form',
  fields: [
    {
      name: 'name',
      component: 'TextField',
      label: 'Name'
    },
    {
      name: 'email',
      component: 'EmailField',
      label: 'Email'
    },
    {
      name: 'password',
      component: 'PasswordField',
      label: 'Password',
      hidden: true,
      in: false,
      out: false
    }
  ]
}
However, your EditPasswordForm may need to allow such access:
{
  name: 'EditPasswordForm',
  component: 'MyUser',
  listeners: [
    {
      event: 'create',
      actions: [
        {
          // Hide all fields
          component: 'Set',
          name: 'hidden',
          value: true
        },
        {
          // Show password field
          component: 'Set',
          name: 'fields.password.hidden',
          value: false
        },
        {
          // Allow user to write password to the back end
          component: 'Set',
          name: 'fields.password.out',
          value: true
        }
      ]
    }
  ]
}
Next Steps
Before publishing this post, I had showed MSON to only a handful of people. This may seem odd for an open-source project, but it was intentional, as I wanted to flesh out the language before doing a wider release. I didn’t want people to start using something where the building blocks would be changing drastically. Therefore, I started with a basic prototype of the compiler and then started building a sample app written in MSON. This allowed me to use an iterative approach to see what works and what doesn’t work. And after several rewrites of the compiler, thank goodness for unit tests and a patient wife, I’ve been able to implement a full-featured app. I’m sure the language will continue to evolve, but I now feel confident that MSON is a solid foundation on which to build.
The MSON compiler is completely written in JS and runs in both the browser and on Node.js. The repo is hosted on github at https://github.com/redgeoff/mson — if you like the idea please give it a star.
I also plan on monetizing this idea by developing out mson.co, which will host a UI that anyone can use to make software. The UI will read, modify and write MSON behind the scenes and a back end will automatically be created based on your component definitions. And for developers, you’ll have the option of using as much of the mson.co stack as you wish, e.g. you could bootstrap your app using the MSON UI Builder and then replace/customize the front end with your favorite technologies (the mson.co back end is exposed via a GraphQL API). Or, you can use MSON on just the front end and create your own custom back-end API.
I hope you enjoyed reading this post and I would love to hear your thoughts.